
Video Expert Lab is a place for video enthusiasts and power users. Pick what you want, leave what you know.
Video Expert Lab is a place for video enthusiasts and power users. Pick what you want, leave what you know.
August 1 2016
In this guide, we’ll look at how Avid Media Composer structures data and media, and the typical workflow.
Who is Avid Media Composer for?
Now would be a good time to assess if Media Composer is the right tool for you or not. Look at the features:
Avid Media Composer is built for a collaborative environment. You must define a User before you can start using Media Composer.
Which kind of workflow needs all these features at the same time? In one word: Broadcasting. Another group might be high-end visual-effects driven feature-length features, where media and data might fly in and out from all corners of the earth.
What if you’re just a single user looking to edit an indie movie, a short film, a commercial or a corporate video? You could still use Avid Media Composer to do your work, and only you can make that decision.
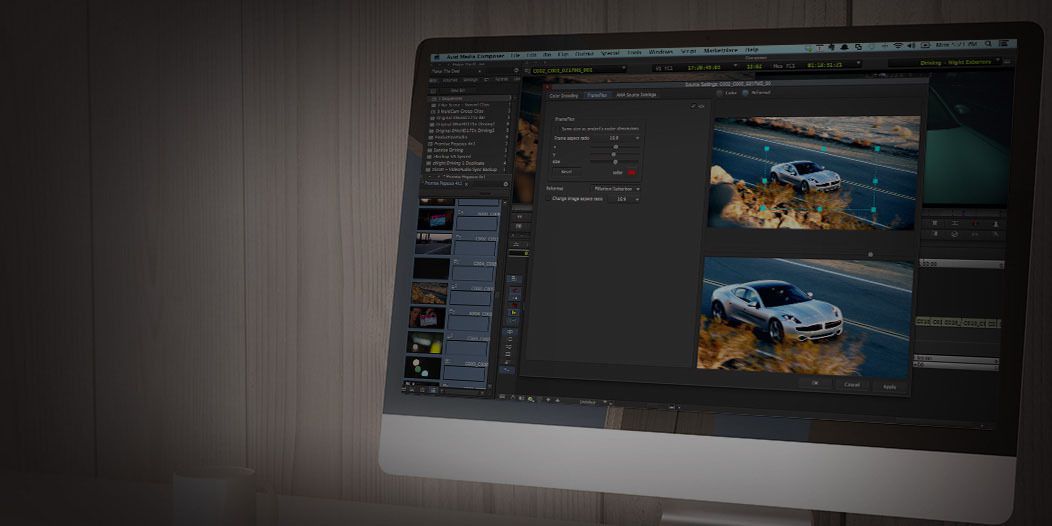
Typical Avid Media Composer Workflow
For all its complex features, the workflow within Media Composer is surprisingly simple:
Import your codec via:
In addition to DNxHD, you can also work in uncompressed 8-bit or 10-bit footage within Media Composer.
Once you finish editing, you can grade with tools like Baselight, Composite Suite Pro, Red Giant Looks, etc. You can add effects and filters with the many plug-in options available, or with Media Composer’s in-built effects library.
When you’re done, you can output directly from Avid Media Composer, or you can conform to Symphony for grading and finishing in the resolution of your original media.
How data is structured in Avid Media Composer
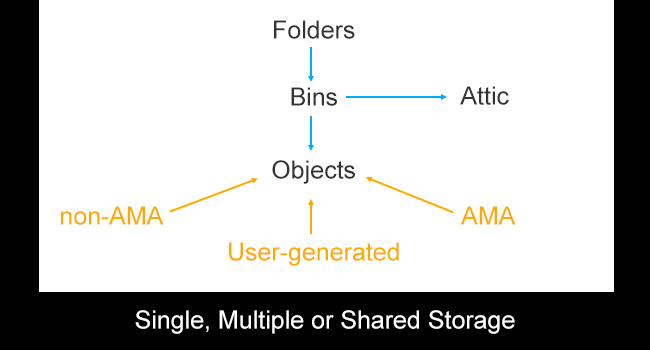
Bin
At the core of everything is the ‘bin’, which comes from the film days where film strips, reels and spools were dumped into bins. It’s just a virtual container for your media files. When you create sequences, you will be storing them in bins.
Bins also contain your media, and anything else you can import for your work. Bins can be shared among different editors.
Objects
Anything in the bin is an object. These objects can be user-generated (sequences, effects, etc.), imported file-based codecs (AMA) or ingested/captured footage from tape devices (non-AMA).
Folders
Avid Media Composer gives you one additional tier of organization, in the form of Folders. You can organize multiple bins into folders, which is a handy feature for large projects where bins can get old and need to be archived, etc.
Attic
Avid saves your work periodically. Avid is actually saving the specific bin in which you’re working, and this is saved as a backup file in a separate folder on your hard drive, under the name ‘Avid Attic’. You could choose to write a new file or overwrite the existing backup from the settings.
Storage
Everything is stored somewhere, more specifically, hard drives. These could be:
By default Avid already knows where to store what, unless you have multiple drives or shared storage. In this case you’ll need to configure your settings to tell it where things must go.
Avid Media Access (AMA)
This is Avid’s way of telling you that it can edit files natively. Unfortunately, Avid has complicated things a bit by requiring you to download and install a different plug-in for each codec. You’ll find the available plug-ins and codecs here. Once installed, restart Avid Media Composer.
To check which plug-ins are installed, go to Tools > Console. You’ll get a command-line console, where you type AMA_Listplugins and hit Enter/Return. Make sure your installed plug-ins show up here.
There are some instances where you will need to tell Media Composer which plug-in you intend to use before you work on a specific codec, like in the case of creating profiles for Dynamic Media Folders.
Source from: http://wolfcrow.com/blog/how-to-import-video-into-avid-media-composer-part-two-data-and-workflow/
Now you would have a brief knowledge of Avid Media Composer workflow. In next guide, I will talk about how to import videos to Avid Media Composer in different codecs.
Related Guides:
How to Import Videos to Final Cut Pro X
How to Import Video into Final Cut Pro X Guide 2


/image%2F2101206%2F20160811%2Fob_0f2b1d_import-vidoese-to-avid.jpg)
/image%2F2101206%2F20170913%2Fob_d94632_iphone-7-video-to-avid.jpg)
/image%2F2101206%2F20170712%2Fob_d87aae_dji-osmo-to-fcp.jpg)
/image%2F2101206%2F20170706%2Fob_7feac1_alexa-mini-to-avid-adobe.jpg)